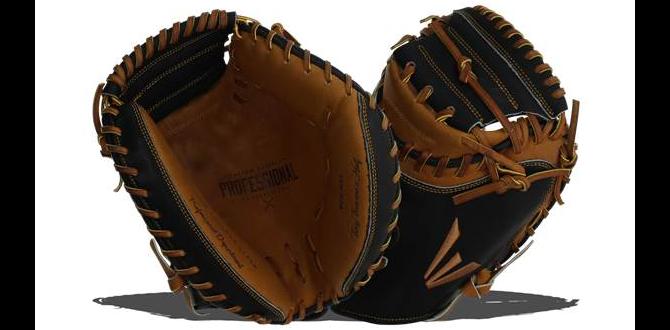
Quick Summary: Properly fitting Force3 Catcher’s Knee Savers is essential for maximum comfort and protection at the plate. This guide walks you through each step to ensure a secure, supportive fit that reduces strain and enhances performance.
Force3 Catchers Knee Savers Fitting: Proven Comfort for Every Catcher
Are your knees feeling the pressure after a long game or practice? For catchers, knee discomfort can be a common, frustrating issue. The constant squatting, blocking, and shifting can take a toll. But what if there was a way to significantly boost your comfort and protect your knees? That’s where Force3 Catcher’s Knee Savers come in. They’re designed to provide exceptional support and shock absorption. This article will guide you through getting the perfect fit for your Force3 Knee Savers, step-by-step, so you can focus on the game, not your aches and pains. Let’s get your gear dialed in!
Why Proper Fitting Matters for Your Knee Savers
Think of your catcher’s gear as an extension of your body. Just like a glove needs to feel like a part of your hand, your knee savers need to fit perfectly to do their job. When they’re not fitted correctly, they can be more of a distraction than a help. They might slip, chafe, or even shift in ways that don’t provide the intended support. This can lead to discomfort, reduced mobility, and, in the worst case, less protection when you need it most – like during a dive for a wild pitch.
The Force3 Knee Savers are engineered with advanced technology to absorb impact and distribute pressure. However, this engineering only works its magic when the savers are snug and positioned correctly on your legs. A proper fit ensures that the protective padding is exactly where it needs to be, cushioning your knees from the hard ground and absorbing the jarring force of blocking. It’s about maximizing their performance so you can perform at your best.
Understanding the Force3 Advantage
Before we dive into the fitting process, let’s briefly touch on what makes Force3 Knee Savers stand out. Force3 set out to revolutionize catcher’s equipment by focusing on two key areas: protection and performance. Their patented Shock-Splitting Plate technology is at the core of their knee savers. This unique design redirects impact forces away from the knee joint, significantly reducing the stress on your joints. Unlike traditional padding that just absorbs shock, Force3’s technology is designed to distribute and disperse it. This means less direct force hitting your knees, leading to less fatigue and fewer injuries over time.
Furthermore, the materials used in Force3 gear are chosen for durability and comfort. They aim to provide a secure fit without restricting movement, which is crucial for a catcher who needs to be agile behind the plate. This combination of innovative technology and thoughtful design is why so many catchers are turning to Force3 to protect their most vital joints.
Your Step-by-Step Guide to Fitting Force3 Knee Savers
Getting your Force3 Knee Savers to feel like they were made just for you is a straightforward process. It involves a few key checks and adjustments. Follow these steps to ensure a perfect, comfortable, and protective fit every time.
Step 1: Gather Your Equipment and Yourself
Before you start, make sure you have your Force3 Knee Savers and the gear you typically wear them with. This includes:
- Your Force3 Catcher’s Knee Savers
- Your catcher’s leg guards (the shin guards)
- A comfortable pair of athletic socks
It’s also helpful to have a mirror nearby, especially if you’re doing this for the first time. You want to be able to see how the savers are sitting on your legs and how they interact with your leg guards.
Step 2: Put On Your Socks and Leg Guards
Start by putting on your athletic socks. Then, put on your catcher’s leg guards as you normally would. Ensure they are adjusted and secured comfortably. This is the base layer that your knee savers will work with. The fit of your leg guards can influence how the knee savers sit, so make sure they are in their usual position.
Step 3: Position the Force3 Knee Savers
Now, take one Force3 Knee Saver and place it on your knee. The key here is to position it so that the primary padded guard sits directly over the kneecap and the surrounding soft tissue. The goal is to have the Shock-Splitting Plate aligned to absorb impacts directly to the front and sides of your knee.
You’ll notice that the knee savers have straps. These are designed to help secure the pad in place. Don’t overtighten them at this stage; we’re just getting them into the right general position.
Step 4: Adjust the Straps for a Secure Fit
This is where the magic happens. The Force3 Knee Savers typically have multiple adjustable straps. Start with the strap that goes around the widest part of your calf, below the knee. Tighten it enough so that the knee saver feels anchored, but not so tight that it’s uncomfortable or restricts blood flow. You should feel it holding the saver snugly against your leg.
Next, adjust the strap(s) that go around your thigh, above the knee. These straps help to pull the knee saver up and keep it in position. Again, aim for a snug but comfortable fit. You want the knee saver to stay put when you bend your knee, stand up, or even do a light jog. The key is that it doesn’t slide down your leg. A good test is to bend your knee and then straighten it fully. The knee saver should stay relatively in place without significant slipping.
Step 5: Integrate with Your Leg Guards
The Force3 Knee Savers are designed to work in conjunction with your leg guards. Ensure that the top edge of the knee saver fits comfortably beneath the bottom edge of your leg guard. There shouldn’t be a major gap where your knee is unprotected, nor should the knee saver be bunching up uncomfortably under the leg guard.
If your leg guards have a dedicated knee pad area, the Force3 saver should either fit snugly inside it or rest directly against it. Experiment with slight adjustments to both the knee saver straps and the leg guard straps to find the best overall feel. You want a seamless transition from your leg guard to your knee saver, with no pinching or pressure points developing.
Step 6: Test the Fit with Movement
Once you’ve got the straps adjusted, it’s time to test. Get up and move around. Perform actions that you would do as a catcher:
- Squat down as if receiving a pitch.
- Crouch and then quickly stand up.
- Shift your weight from side to side.
- Pretend to block a pitch.
- Walk a few steps.
Pay close attention to any discomfort. Are there any straps digging in? Is the pad shifting significantly? Is there any part of your knee that feels exposed when you move? If you notice any issues, loosen or retighten the straps as needed. It might take a few tries to find that sweet spot where comfort and security meet.
Step 7: Fine-Tuning for Long-Term Comfort
Even after the initial fitting, don’t be afraid to make minor adjustments during your first few practices or games. Your body might feel different throughout the day, and your gear can settle. If a strap starts to feel a bit too tight after an hour, loosen it slightly. If you feel a slight slip, tighten a strap a notch. The goal is to achieve a fit that feels secure and supportive for the entire duration of your activity.
Remember, the best fit is one you don’t have to think about. When your knee savers feel like they’re just… there, doing their job without getting in your way or causing discomfort, you’ve achieved the perfect fit.
Key Aspects of a Proper Force3 Knee Saver Fit
Here’s a quick rundown of what to look and feel for to confirm your Force3 Knee Savers are fitted correctly:
- No Slipping: The knee saver should stay in place when you bend and extend your leg.
- Even Pressure: The straps should feel snug but not constricting. You shouldn’t have strong pressure points.
- Full Coverage: The main padded guard should cover your kneecap and the surrounding area effectively.
- Comfortable Integration: It should align well with your leg guards, creating a smooth protective layer without interference.
- Freedom of Movement: You should be able to move naturally without feeling restricted by the gear.
Troubleshooting Common Fitting Issues
Even with a guide, you might encounter a few snags. Here are some common issues and how to solve them:
| Problem | Potential Cause | Solution |
|---|---|---|
| Knee saver slips down the leg. | Straps are too loose, or your leg guards are not positioned correctly. | Tighten calf and thigh straps evenly. Ensure leg guards are snug. If the issue persists, consider dryer sheets to reduce friction between skin/sock and the saver. |
| Straps are digging into skin/causing discomfort. | Straps are overtightened, or positioned incorrectly. | Loosen straps slightly. Check for any folds or twists in the straps themselves. If the issue is persistent, ensure you’re wearing appropriate athletic socks. |
| Pad doesn’t feel like it’s covering the knee properly. | Incorrect initial positioning. | Re-center the padded guard over your kneecap before tightening straps. Ensure the Shock-Splitting Plate is aligned to face forward. |
| Interference with leg guards. | Knee saver is too bulky, or leg guards are too tight/differently shaped. | Slightly adjust the position of both the knee saver and leg guard. Some knee savers have a slimmer profile that might work better with specific leg guards. Check the manufacturer’s recommendations for compatibility. |
| Discomfort when bending the knee. | Straps too tight, or pad is in the wrong spot. | Loosen straps. Ensure the pad is centered and not being bunched up by the bend of your knee. |
The Impact of a Good Fit on Performance and Health
Why go through the trouble of ensuring a perfect fit? It’s directly tied to your ability to perform on the field and your long-term health. A well-fitted Force3 Knee Saver does more than just feel good; it actively contributes to better performance and injury prevention.
Enhanced Comfort and Endurance
When your knee savers are comfortable and stay in place, you can focus 100% on the game. No more mental energy spent adjusting gear or dealing with nagging pain. This improved comfort translates to better endurance, allowing you to maintain your focus and intensity throughout the entire game, from the first pitch to the last out. You can receive, block, and move with confidence, knowing your knees are protected and supported.
Reduced Risk of Injury
Catching is physically demanding. The repetitive stress and high-impact moments can lead to injuries like patellofemoral pain syndrome (runner’s knee), meniscus tears, or general knee strain. Force3’s Shock-Splitting Plate technology, when properly fitted, is designed to significantly reduce the forces transmitted to your knee. A good fit ensures this technology is optimally positioned to absorb and redistribute impact, minimizing the risk of acute injuries and the development of chronic pain.
The National Institute of Arthritis and Musculoskeletal and Skin Diseases (NIAMS) emphasizes the importance of proper equipment and technique in preventing sports-related injuries. Their advice often includes ensuring gear fits well to provide adequate protection and support. For catchers, this makes knee protection a non-negotiable aspect of their equipment strategy. For more on preventing sports injuries, you can explore resources on websites like NIAMS.
Improved Mobility and Agility
Counterintuitively, extra padding can sometimes hinder movement if not fitted correctly. However, when Force3 Knee Savers have a secure and streamlined fit, they enhance your mobility. They provide a stable base, allowing for quicker transitions from a crouch to a throw, more efficient blocking, and greater confidence in your stance. You can move more freely and explosively because the gear is working with you, not against you.
Maintaining Your Force3 Knee Savers
To ensure your Force3 Knee Savers continue to provide proven comfort and protection, proper care and maintenance are essential. Just like any high-performance equipment, taking care of them will extend their lifespan and effectiveness.
- Cleaning: After each use, wipe down your knee savers with a damp cloth and mild soap to remove dirt and sweat. Avoid harsh chemicals or abrasive cleaners that could damage the materials.
- Drying: Always allow your knee savers to air dry completely before storing them. Never put them in a dryer, as this can degrade the padding and straps. Store them in a cool, dry place away from direct sunlight.
- Inspection: Periodically check the straps, buckles, and padding for any signs of wear and tear. If you notice any damage, such as frayed straps or tears in the material, it might be time to consider replacement to ensure continued protection.
- Strap Adjustment: As you use them, the straps might stretch slightly. Re-adjust them as needed to maintain that perfect, secure fit we discussed.
Frequently Asked Questions About Force3 Catchers Knee Savers
Q1: How often should I check the fit of my knee savers?
It’s a good practice to quickly check the fit and feel of your knee savers before every practice or game. Minor adjustments can make a big difference in long-term comfort.
Q2: Can I wear my Force3 Knee Savers without leg guards?
Force3 Knee Savers are designed to work as a system with leg guards. While you can wear them alone, they offer their best protection and integrate most effectively when used with your catcher’s leg guards.
Q3: My knees still hurt even with the knee savers. What could be wrong?
While Force3 Knee Savers significantly reduce impact, they are not a cure for all knee pain. Persistent pain could indicate an underlying issue requiring medical attention, or that the savers are not fitted optimally. Re-evaluate the fitting steps, ensure they are properly aligned with your leg guards, and consider consulting a coach or a sports medical professional.
Q4: Are Force3 Knee Savers suitable for youth catchers?
Yes, Force3 Knee Savers are an excellent option for youth catchers. Their advanced protection can be especially beneficial for younger players who are still developing their technique and whose bodies are growing. Ensure proper sizing and fitting are done for younger athletes.
Q5: How do I know if my knee saver straps are too tight?
If you feel numbness, tingling, or have visible red marks on your skin that persist after removing the gear, the straps are likely too tight. You should feel snug support, not constriction.
Q6: Can these knee savers be worn for other positions or sports?
While designed for catchers, the Force3 Knee Savers can offer enhanced knee protection for other baseball positions that involve a lot of squatting or kneeling, such as umpires or coaches. They are specialized for the demands of catching, though.
Conclusion
Ensuring your Force3 Catcher’s Knee Savers are fitted correctly is a critical step in maximizing your comfort, performance, and protecting your knees. By following this detailed guide, you can achieve a secure, supportive fit that allows you to play your best game. Remember that proper gear fit isn’t just about feeling good; it’s about staying healthy and performing at your peak. Take the time to dial in your fit, and you’ll feel the difference on the field. Keep practicing, stay protected, and enjoy the game!