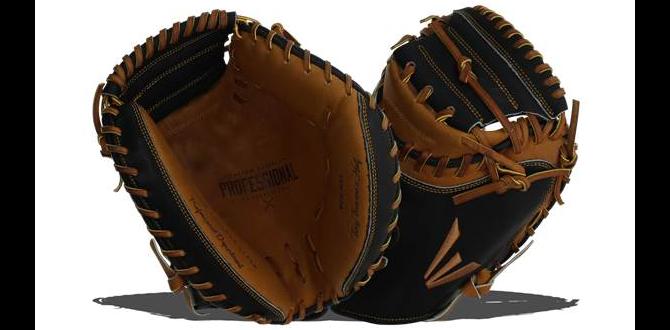
The Force3 catchers mask fitting process is crucial for catcher safety and comfort. A proper fit means the mask stays securely in place, offers optimal visibility, and protects effectively, so you can focus on the game. This guide walks you through each step to ensure your Force3 mask is perfectly adjusted for peak performance.
Ever feel like your catcher’s mask is a bit… off? Maybe it slides down when you move, or feels heavier than it should. Getting the right fit for your Force3 mask is super important for two big reasons: safety and comfort. When your mask fits perfectly, it’s like a part of you, protecting your face without getting in the way. If it’s loose, it might not protect you well, but if it’s too tight, it can be uncomfortable for a whole game. We’re going to make sure your Force3 mask feels just right with some easy steps. Ready to get that perfect fit?
Why a Proper Force3 Catcher’s Mask Fit Matters
There’s more to fitting a catcher’s mask than just slapping it on. For a Force3 mask, which is designed with advanced protection in mind, a correct fit is absolutely essential. It ensures the mask stays put, absorbs impact as intended, and allows you, the catcher, to have clear vision and unimpeded movement. Let’s break down why this is so critical:
- Maximum Protection: When a Force3 mask is fitted correctly, its advanced impact-absorbing technology sits perfectly against your head. This means any foul balls or errant pitches get their force dissipated effectively, minimizing the risk of injury. A poorly fitted mask might shift or have gaps, compromising this vital protection.
- Unrestricted Vision: A catcher’s ability to see the field, the pitcher, and runners is paramount. A properly fitted mask provides a clear, wide field of vision. It won’t obstruct your sightlines or force you to tilt your head unnaturally to see what’s happening.
- Comfort During Play: You’re wearing this gear for hours – during practice, during games, and maybe even extended tournaments. A mask that pinches, rubs, or is too loose will be a constant distraction at best, and painful at worst. The right fit means you can focus on your game, not on adjusting your gear.
- Improved Performance: When you’re not worried about your mask moving or being uncomfortable, you can play with more confidence. This translates to better focus, quicker reactions, and ultimately, a higher level of performance behind the plate.
- Durability of Gear: While not a primary function, a well-fitted mask will experience less undue stress on its components, potentially contributing to its longevity.
Understanding Your Force3 Catcher’s Mask
Before we dive into fitting, let’s quickly touch on what makes a Force3 mask special. They are engineered with innovative technologies like the “Triple Impact Protection” system, which is designed to absorb and reduce direct and indirect impact forces. Knowing this helps you appreciate why a precise fit is so important to harness its full protective potential. Force3 masks typically come in a few different models, but the principles of a good fit remain consistent.
Before You Start: What You’ll Need
Getting a good fit is a straightforward process, but having a few things ready will make it smoother.
- Your Force3 Catcher’s Mask: Of course!
- Your Catcher’s Helmet: The mask attaches to your helmet, so ensure you have the helmet you plan to use.
- A Mirror: This is essential for seeing how the mask sits and if it’s aligned properly. A full-length mirror is ideal.
- A Helper (Optional but Recommended): Having someone else observe can catch details you might miss.
- A Measuring Tape (Optional): For verifying measurements against established guidelines if you’re unsure.
The Step-by-Step Force3 Catcher’s Mask Fitting Guide
Let’s get this mask fitted perfectly. Take your time with each step.
Step 1: Prepare Your Equipment
First things first, make sure your Force3 catcher’s mask and your catcher’s helmet are clean and ready to go. If your mask has any adjustable straps or components, ensure they are loosened enough to allow for adjustment. Some Force3 model masks might attach differently to helmets, so familiarize yourself with your specific mask’s attachment points. For most modern Force3 masks, the attachment will be via a secure bracket system that aligns with specific mounting points on the back of the catcher’s helmet.
Step 2: Put On Your Catcher’s Helmet
Place your catcher’s helmet on your head as you normally would for a game. It should feel snug and secure, sitting level on your head without wobbling excessively. Ensure the chin strap is fastened, though not overly tight at this stage. The helmet is the foundation for the mask fit.
Step 3: Attach the Force3 Mask to the Helmet
This is where the specific design of your Force3 mask comes into play.
- Identify Attachment Points: Look at the back of your helmet and the corresponding attachment points on your mask (often located on the top rear or side brackets).
- Align and Click: Usually, Force3 masks click or slide into place. Align the mask’s brackets with the helmet’s slots and apply firm, steady pressure until you hear or feel a secure connection. Refer to your Force3 mask’s specific manual if you’re unsure about the attachment mechanism. Many Force3 facemasks use a robust clipping system.
Step 4: Check Horizontal Alignment
With the mask attached to the helmet and the helmet on your head, look in the mirror.
- Level Position: The mask should sit level with your helmet. The top bar of the mask should be parallel to the ground, not tilted up or down.
- Centered: The mask should be centered in front of your face. The bars should be equally spaced on either side of your nose.
- Eye Level: Ensure the horizontal bars of the mask are positioned so they don’t obstruct your primary field of vision. Ideally, the bars should fall in your peripheral vision, not directly in the center where you look directly at the pitcher.
If the mask seems misaligned horizontally, you might need to detach and re-attach it, ensuring the brackets are seated correctly. Some helmet-and-mask combinations might offer minor fore/aft adjustments.
Step 5: Check Vertical Alignment and Coverage
Now, let’s focus on how high or low the mask sits and how well it covers your face.
- Chin Clearance: There should be a comfortable gap between the bottom of the mask (often the chin bar) and your chin. You should be able to move your jaw minimally without the mask digging in. A general guideline is that the chin bar should extend slightly below your chin.
- Forehead Coverage: The top of the mask should align with or slightly below the brow line of your helmet. It should not sit so high that your forehead is exposed, nor so low that it presses uncomfortably on your eyebrows.
- Cheekbone/Jawline Fit: The side bars of the mask should follow the general contour of your face. They shouldn’t be so wide that they leave large gaps on the sides of your jaw or so narrow that they press uncomfortably against your cheekbones.
If vertical alignment is an issue, first ensure your helmet is seated correctly on your head. If the helmet is fine, check if your Force3 mask or helmet has any vertical adjustment features. Some helmets allow for slight adjustments in how the mask mounts.
Step 6: Adjust the Harness and Straps
Most Force3 masks come with an adjustable harness system at the back of the helmet. This is crucial for securing the mask.
- Tighten Evenly: Adjust the straps so they are snug but not constricting. The goal is to keep the helmet and mask unit stable on your head. The straps should feel secure against the back of your head and neck.
- No Pinching: Ensure no straps are pinching or rubbing uncomfortably.
- Test for Movement: With the harness tightened, try to intentionally jiggle your head. The mask and helmet unit should move together as a single piece, with minimal independent movement of the mask.
Step 7: Perform the “Shake Test”
This is a key test for security.
- Gentle Shake: With the mask on and all straps adjusted, gently shake your head from side to side and nod.
- Forward and Back: Nod your head forward and backward.
- Observe Movement: The mask should stay firmly in place. There should be no significant shifting or rattling. If it moves too much, tighten the harness straps a bit more.
Step 8: Test Your Field of Vision
This is where you confirm that the fit isn’t compromising your ability to play.
- Look Around: In the mirror, turn your head from side to side, look up and down.
- Peripheral Vision: Focus on your peripheral vision. Can you easily see a baseball coming from the pitcher? Can you track runners on base?
- No Obstructions: The bars of the mask should not be directly in your line of sight for critical game situations. You should be looking through the mask, not at the mask.
If your vision is obstructed, you may need to slightly adjust the helmet’s position or check if the mask can be repositioned on the helmet mounts.
Step 9: Check for Pressure Points and Discomfort
Wear the fitted mask for a few minutes and pay attention to any discomfort.
- Pressure Spots: Are there any areas on your forehead, cheeks, jaw, or nose where the mask tubing or bars are pressing too hard?
- Rubbing: Are any parts of the mask rubbing against your skin, especially with sweat?
- Breathing: Does the mask interfere with your breathing? (Unlikely with a good fit, but worth checking).
If you find pressure points, try slightly loosening the rear harness. If the problem persists, it might indicate that the standard mask doesn’t conform well to your facial structure, or that your helmet isn’t sitting optimally. Force3 masks are generally designed to distribute pressure well, so significant discomfort is usually a sign of a fit issue.
Step 10: Make Fine Adjustments
Based on your observations from the previous steps, make any necessary fine-tune adjustments to the helmet’s position, the mask’s attachment, or the harness straps. It’s a iterative process.
Force3 Catcher’s Mask Sizing vs. Fitting
It’s important to distinguish between sizing and fitting. Sizing is about choosing the correct model or general size of mask based on head circumference or player age/level. Fitting, which we’ve been discussing, is the process of adjusting that chosen mask and helmet combination to your specific head shape for optimal performance and safety.
Force3 often offers sizing recommendations based on age, but head shapes vary significantly. Even if you’re the “right size” on paper, the fitting process ensures it works for you.
Table: Common Fitting Issues and Solutions
Here’s a quick look at some common problems you might encounter and how to fix them.
| Problem | Cause | Solution |
|---|---|---|
| Mask slides down forehead | Helmet not snug; Harness too loose | Adjust helmet for a tighter fit; Tighten rear harness straps |
| Mask shifts side-to-side | Harness too loose; Helmet not level | Tighten rear harness straps; Ensure helmet is centered and level |
| Vision obstructed by bars | Mask mounted too low on helmet; Incorrect mask model for face shape | Check helmet position, re-mount mask; Consult Force3 for model compatibility (rare) |
| Chin bar digs into chin | Mask mounted too low; Harness too tight | Check mask vertical alignment; Loosen harness slightly |
| Pressure points on face/head | Uneven strap tension; Mask too narrow for face shape | Adjust harness for even pressure; Loosen problematic straps slightly. Consider an aftermarket comfort liner if available. |
Ensuring Long-Term Fit and Maintenance
A proper fit isn’t a one-time thing. As gear ages and players’ heads grow (especially for younger athletes), re-fitting might be necessary.
- Regular Checks: Before each practice or game, give your mask and helmet a quick check. Does anything feel different?
- Cleanliness: Keep your mask and helmet clean. Sweat and dirt can affect foam padding and strap material, potentially impacting fit and comfort over time. You can typically wipe down the mask and helmet with a damp cloth. For the harness, consult your Force3 manual.
- Strap Wear: Periodically inspect the harness straps for signs of wear and tear. If they look frayed or stretched, they may need replacing, which can affect how securely the mask fits.
- Gear Updates: As players grow, they will eventually outgrow their helmet and mask systems. Re-evaluate fit regularly, especially during growth spurts common in youth athletes.
Factors Affecting Fit
Several factors can influence how your Force3 catcher’s mask fits. Being aware of these can help you troubleshoot.
- Helmet Model: The specific catcher’s helmet you use is a major factor. Not all masks are perfectly compatible with all helmets due to differing mounting systems. Force3 masks are designed to work with many popular helmets, but it’s always best to check compatibility if purchasing separately. For a comprehensive guide on catcher’s helmets, check out resources on NCAA Baseball.
- Head Shape: Everyone’s head is unique – some are rounder, some are longer. This means a mask that fits one person perfectly might need slight adjustments for another, even if they wear the same size.
- Facial Features: The width of your jaw, the prominence of your cheekbones, and the shape of your nose can all impact how the mask rests on your face.
- Hair: While usually a minor factor, very thick or voluminous hair can sometimes affect the initial seating of the helmet and subsequent mask fit.
Frequently Asked Questions (FAQ)
Q1: How do I know if my Force3 catcher’s mask is the right size?
A1: A good starting point is to check Force3’s sizing charts, often based on head circumference. However, even with the correct size, proper fitting as described in this guide is essential to ensure it works for your unique head shape and facial structure.
Q2: Can I use a Force3 mask with any catcher’s helmet?
A2: Force3 masks are designed to be compatible with most modern catcher’s helmets that feature standard mask mounting points. It’s always advisable to check the specific compatibility notes for your mask and helmet model, or try them together if possible before purchasing.
Q3: How tight should the harness straps be on my Force3 mask?
A3: The harness straps should be snug enough to keep the helmet and mask unit stable on your head without wobbling, but not so tight that they cause discomfort or pressure points. You should be able to move your head without the gear shifting independently.
Q4: My Force3 mask feels heavy. Is this normal?
A4: Force3 masks are built with advanced protective materials, which can add some weight. However, a proper fit distributes this weight evenly, making it feel balanced and manageable rather than burdensome. If it feels excessively heavy or unbalanced, re-check the helmet’s seating and the mask’s alignment.
Q5: How often should I check the fit of my Force3 catcher’s mask?
A5: It’s a good practice to perform a quick check before each practice or game. Re-fitting might be necessary periodically, especially for growing players or if you notice any changes in comfort or stability.
Q6: What if the mask bars are still annoying my vision?
A6: Ensure your helmet is sitting correctly and level on your head. If the mask is attached properly, and the issue persists, carefully re-examine how the mask is positioned. Sometimes, a slight adjustment of the mask’s mounting bracket on the helmet can help fine-tune visibility. For persistent issues, consult the Force3 website or a specialized equipment retailer.
Q7: Can I wear glasses under my Force3 catcher’s mask?
A7: While some players do wear glasses, it can significantly impact fit and comfort. The mask might press the glasses into your face, or the glasses might interfere with the mask sitting correctly. Some specialized catcher’s helmets or masks offer options for sunglass integration, but typically, wearing contacts or prescription inserts fitted to the mask/helmet system is a better solution for optimal fit and safety.
Conclusion: Your Secure Fit for a Safer Game
Getting the fit of your Force3 catcher’s mask dialed in is more than just about comfort; it’s about ensuring you have the best possible protection and visibility on the field