Are you looking to take your baseball practice to the next level? Setting up a blue flame pitching machine can help you get there, providing you with the opportunity to work on your batting technique and accuracy in a safe and consistent environment.
With the right setup, you can practice like a pro and increase your game performance. In this article, we will explore how to set up a blue flame pitching machine, from choosing the right model to setting up the machine and safety concerns.
By the end of this article, you will have all the information you need to get your pitching machine up and running. So, let’s dive in and get started!

How To Set Up A Blue Flame Pitching Machine

Are you looking for the perfect way to set up a blue flame pitching machine? You’ve come to the right place. In this article, we will provide a step-by-step guide on how to set up a blue flame pitching machine in the most efficient and effective way. With the right setup, you’ll be able to make the most out of your blue flame pitching machine and get the most out of your pitching practice. So, let’s get started!
Assemble Machine
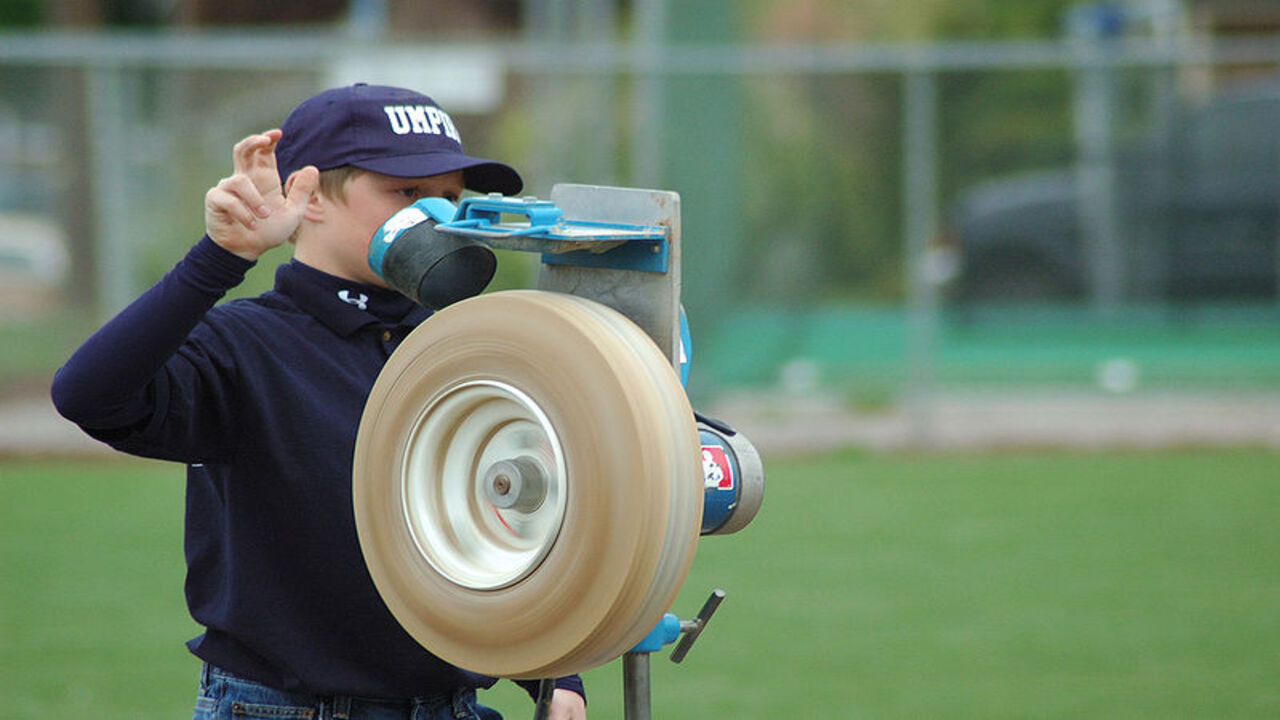
Setting up a Blue Flame Pitching Machine can help you improve your baseball skills. The machine can throw different types of pitches and help you practice hitting against different speeds and angles. Assembling the Blue Flame Pitching Machine is easy and can be done in a short amount of time.
To assemble the Blue Flame Pitching Machine, you will need:
- Allen Wrench
- Phillips Screwdriver
Follow these steps to set up the Blue Flame Pitching Machine:
- Attach the back base of the machine to the bottom base using the included screws and an Allen wrench.
- Attach the pitching arm to the back base of the machine using the included screws and a Phillips screwdriver.
- Attach the catcher bag to the front base of the machine using the included nuts and bolts.
- Connect the power cord and plug the machine into a power source.
- Fill the pitching arm with the provided balls.
- Turn on the machine to start pitching.
Once the machine is assembled, you are ready to practice your hitting skills. Make sure to read the operating manual before using the machine to ensure that you are using the machine in a safe manner. Have fun!
Unpack Machine
To begin setting up a Blue Flame Pitching Machine, the first step is to unpack it. Carefully unpack the machine and all its components, including the main machine, the frame, the pitching wheel, and the motor.
Check that all the parts are included and in good condition. Place all items in a safe, secure location where they won’t be disturbed.
Attach Legs
Attaching the legs to the Blue Flame Pitching Machine is the next step in the setup process. Begin by laying the machine flat on the ground. Take the two legs and line them up with the pre-drilled holes on the bottom of the machine. Secure the legs to the machine with bolts and nuts. Make sure to tighten them securely. Finally, check that all the legs are securely attached to the machine.
Install Wheels
Installing the wheels on a Blue Flame pitching machine is an easy task. First, attach the two wheel brackets to the frame of the machine. Then, align the wheels in the brackets and secure them with the included bolts and nuts. Finally, connect the power supply to the machine and turn it on. The wheels are now ready to use.
Connect Motor
To connect the motor, first locate the power cord connected to the motor and plug it into an outlet. Then, plug the battery pack into the motor. Finally, switch the power switch to the “On” position. Now, the motor is ready to be used.
Position Machine
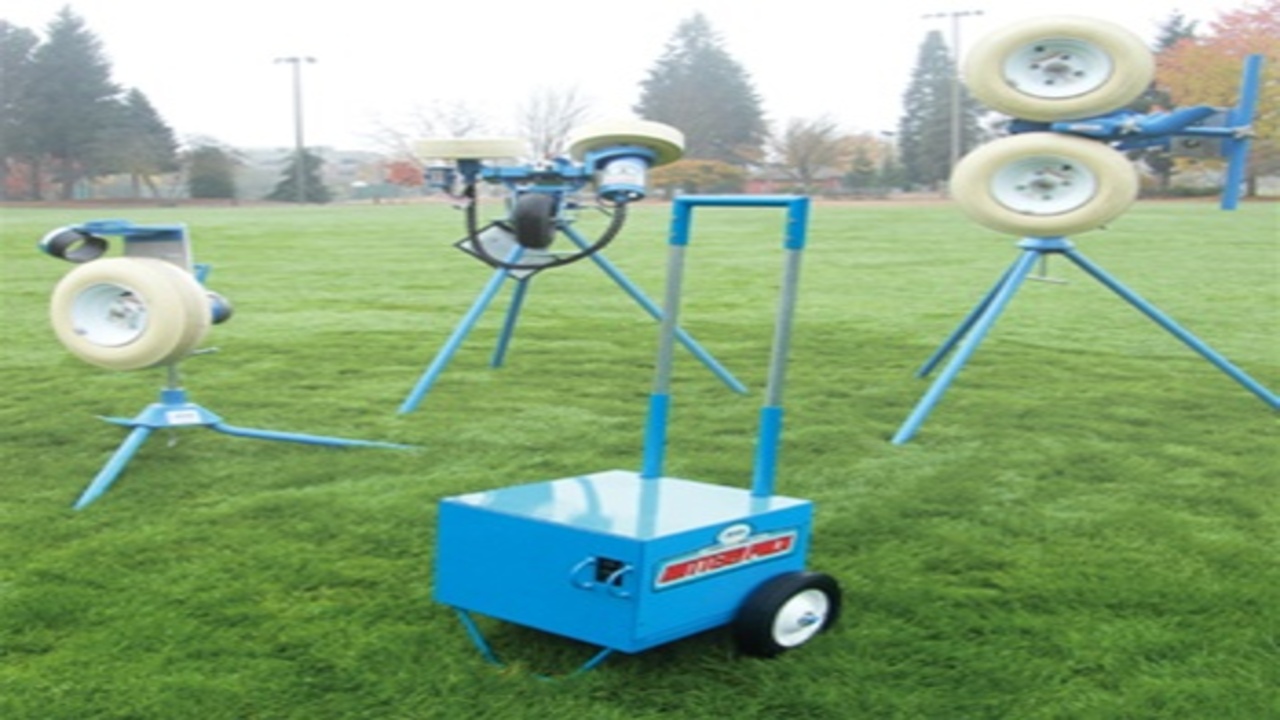
If you’re a coach or an athlete, setting up a Blue Flame Pitching Machine is easy and can provide a great way to improve your baseball skills. This guide will walk you through the basics of positioning the machine.
Steps for Positioning Machine
- Place the machine on a flat surface and make sure it’s stable.
- Decide on the desired pitch location. This can vary depending on the type of pitch and the skill level of the athlete.
- Adjust the height of the machine to be appropriate for the desired pitch location.
- Set the speed of the machine to the desired speed.
- Adjust the angle of the machine so that the pitch is aimed at the desired location.
- Make sure the machine is securely fastened to the ground.
Additional Tips
- It’s important to keep the machine in a safe area away from any other players.
- The machine should be positioned at least 10 feet away from the hitter.
- It’s important to make sure the machine is set up and positioned correctly to ensure safety.
- If the machine is not properly secured it could move or shift during the pitching process, leading to injury or poor performance.
With the right setup and preparation, a Blue Flame Pitching Machine can be a great asset to any team’s practice session. Following these steps will ensure the machine is set up correctly and safely.
Adjust Angle
Adjusting the angle of a Blue Flame Pitching Machine is a key part of setting it up. To do this, first make sure the machine is securely placed on the ground. Then, use the adjustable knob to change the angle so that the machine is facing the desired direction.
Finally, use the knobs to make fine adjustments until the angle is just right.
Set Distance
When setting up your blue flame pitching machine, make sure you set the distance correctly. This will ensure that your pitching machine is accurate and that your pitches are consistent. To set the distance, use a measuring tape and measure from the back of the machine to home plate.
Make sure the distance is between 40-60 feet. Once you have the correct distance, mark the spot with a piece of tape or a cone. That way you won’t forget the exact distance.
Test Pitch Speed
Testing pitch speed is an important part of setting up a Blue Flame Pitching Machine. To do this, you need to adjust the speed knob on the machine to the desired speed. This can be done by turning the knob clockwise to increase the pitch speed or counterclockwise to decrease it. You can also measure the pitch speed with a radar gun.
Once the desired speed is set, you can start testing your pitches.
Connect Power Source
The Blue Flame Pitching Machine is an efficient and effective way to practice baseball. Setting it up correctly is crucial to getting the most out of the device. Before you begin, make sure you have the necessary tools and materials.
Once you’ve gathered the necessary tools, the next step is to connect the power source. The Blue Flame Pitching Machine runs on 110v AC power, and you’ll need an extension cord to plug it into the wall. Make sure the cord is rated to handle the amount of electricity the machine requires.
To ensure the safety of the user, the power source should be connected to a ground fault circuit interrupter (GFCI). This device monitors the amount of electricity running through the machine and automatically shuts off the power if a short circuit is detected.
Finally, connect the power cord to the machine. Make sure the plug is firmly inserted and check to see if the power switch is turned to the “on” position. When everything is connected properly, the Blue Flame Pitching Machine should be ready to use.
Table :
| Tools and Materials | Description |
|---|---|
| Power Cord | Rated to handle the amount of electricity the machine requires |
| Ground Fault Circuit Interrupter (GFCI) | Monitors the amount of electricity running through the machine |
| Power Switch | Turned to the “On” position |
Plug In Machine
To plug in the machine, find the power switch on the back and turn it to the “on” position. Plug the power cord into an outlet and make sure the light on the control panel is lit. When the machine is on, you’re ready to start pitching!
Turn On Power
To turn on the power for your Blue Flame Pitching Machine, first make sure the power switch is in the “ON” position. Plug the power cord into a working outlet. You should hear a humming sound, indicating the machine is on. Press the power button to begin using the machine.
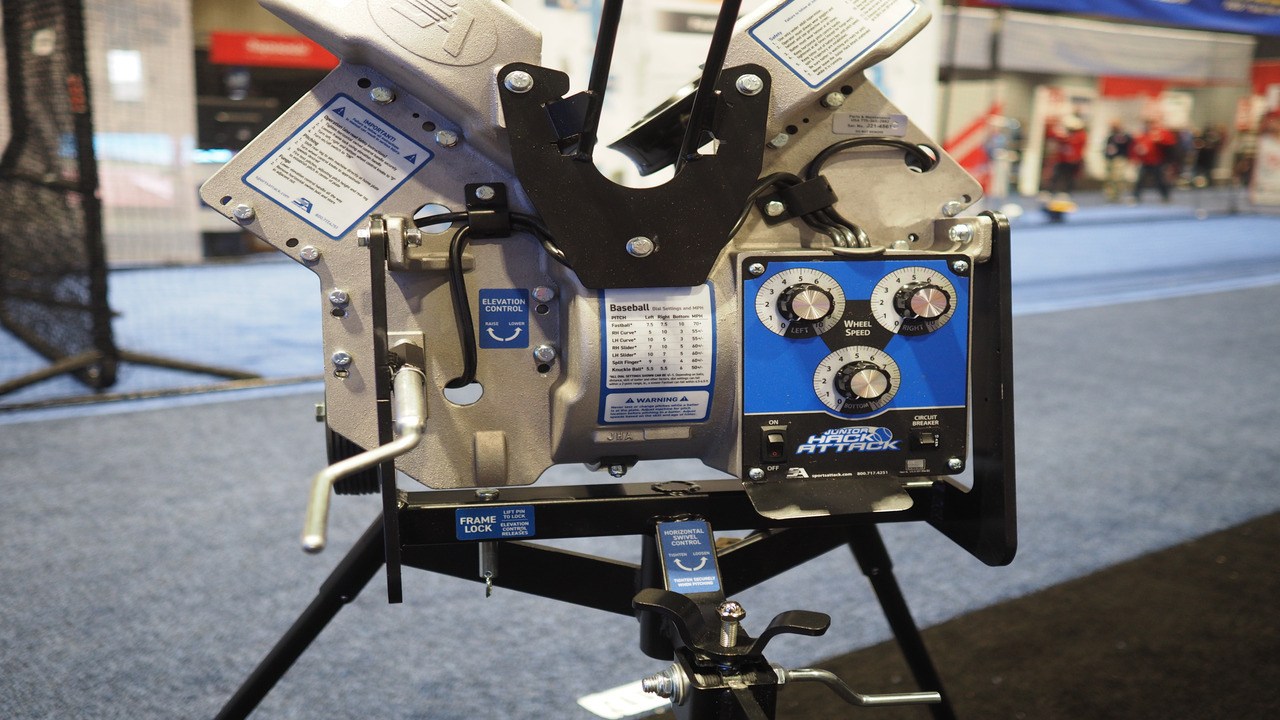
Adjust Settings
as H1, H2, H3 or H4
Before you can use a Blue Flame pitching machine, you need to adjust the settings to make sure it’s ready for use. Here’s how to do it:
- Place the pitching machine in the desired location. It should be placed on flat and level ground.
- Connect the power source. You can either use a 12V battery or an extension cord.
- Adjust the pitch speed. The pitch speed is adjustable between 15 and 85 mph.
- Adjust the pitch height. You can adjust the pitch height between 0 and 6 feet.
- Set the pitch angle. You can adjust the pitch angle between -15 and +15 degrees.
- Adjust the side-to-side angle. The side-to-side angle is adjustable between -15 and +15 degrees.
- Set the pitch type. You can choose either a curveball or a fastball.
Once you have adjusted the settings, the Blue Flame pitching machine is ready to use. Whether you’re a professional baseball player or a recreational hitter, you’ll be able to enjoy the convenience of having a pitching machine at your disposal.
Select Pitch
Selecting the pitch for a Blue Flame Pitching Machine is an important step in setting up the machine. Depending on the model, the pitch can be adjusted through a knob or switch. The pitch can be changed to a fast ball, curveball, slider, or knuckleball. Knowing how to select the desired pitch will help you get the most out of your Blue Flame Pitching Machine.
Set Speed
The next step in setting up a Blue Flame Pitching Machine is to adjust the speed. This can be done by turning the speed knob, located on the side of the machine. It is important to adjust the speed according to the age and skill level of the batter. Once the speed has been set, the pitching machine is ready to be used.
Adjust Ball Feed
To adjust the ball feed of a Blue Flame Pitching Machine, adjust the switch on the side of the machine that says “Ball Feed”. The switch has two settings: “High” and “Low”. If you want to feed more balls, switch the setting to “High”. If you want to feed less balls, switch the setting to “Low”. Once you have set the switch, adjust the speed of the ball feed using the knob on the side of the machine.
Conclusion
This article provides a step-by-step guide on how to set up a blue flame pitching machine. It covers the essential components, including the power source, the hopper, and the net. Additionally, it outlines the necessary safety precautions to ensure a secure and successful set up. With these tips in hand, you’ll be ready to set up your blue flame pitching machine in no time!
FAQs
1.What Are The Benefits Of Using A Blue Flame Pitching Machine?
Ans: The benefits of using a blue flame pitching machine are that it can help improve pitching accuracy and velocity, as well as arm strength and endurance. It also allows you to practice at game-like speeds without the need for a catcher, saving time and money in the process.
Additionally, the machine can be adjusted to throwing different pitches, giving you the ability to improve your skills across the board. Finally, the machine is portable, allowing you to practice wherever you have access to an open field.
2.What Type Of Baseballs Should Be Used With A Blue Flame Pitching Machine?
Ans: The type of baseballs that should be used with a blue flame pitching machine are official league baseballs. These baseballs are designed to provide an accurate and consistent performance when used in a pitching machine.
They also have a higher durability than other types of baseballs, making them better suited for use in a pitching machine. Additionally, these baseballs are the only type approved for use in official league games.
3.What Is The Best Way To Adjust The Settings On A Blue Flame Pitching Machine?
Ans: The best way to adjust the settings on a blue flame pitching machine is to refer to the manufacturer’s instructions. Generally, the settings can be adjusted to affect the speed and trajectory of the balls being pitched. Different settings should be tested to determine which is best for the user’s needs. Lastly, the machine should be set up on a level surface for optimal performance.
4.What Type Of Power Supply Is Needed To Operate A Blue Flame Pitching Machine?
Ans: A blue flame pitching machine requires an AC power supply of 110 volts, 60 Hz, and a minimum of 15 amps. Most machines come with an appropriate power cord and plug. It is important to ensure that the machine is plugged into a dedicated circuit, meaning a circuit that is not shared with any other appliance. It is also important to make sure the circuit is not overloaded, by checking the circuit breaker.
5.How Often Should A Blue Flame Pitching Machine Be Calibrated?
Ans: A blue flame pitching machine should be calibrated at least once a year, or more often if it is used frequently. The calibration should be done by a certified technician and should include checking the speed and accuracy of the machine.
It is also important to check the safety features of the machine, such as the protection guards, to ensure they are in proper working condition. Regular maintenance and calibration of the machine is essential for optimal performance.
{“@context”:”https://schema.org”,”@type”: “FAQPage”,”mainEntity”:[{“@type”: “Question”,”name”: “What Are The Benefits Of Using A Blue Flame Pitching Machine?”,”acceptedAnswer”: {“@type”: “Answer”,”text”: “The benefits of using a blue flame pitching machine are that it can help improve pitching accuracy and velocity, as well as arm strength and endurance. It also allows you to practice at game-like speeds without the need for a catcher, saving time and money in the process. Additionally, the machine can be adjusted to throwing different pitches, giving you the ability to improve your skills across the board. Finally, the machine is portable, allowing you to practice wherever you have access to an open field.”}},{“@type”: “Question”,”name”: “What Type Of Baseballs Should Be Used With A Blue Flame Pitching Machine?”,”acceptedAnswer”: {“@type”: “Answer”,”text”: “The type of baseballs that should be used with a blue flame pitching machine are official league baseballs. These baseballs are designed to provide an accurate and consistent performance when used in a pitching machine. They also have a higher durability than other types of baseballs, making them better suited for use in a pitching machine. Additionally, these baseballs are the only type approved for use in official league games.”}},{“@type”: “Question”,”name”: “What Is The Best Way To Adjust The Settings On A Blue Flame Pitching Machine? “,”acceptedAnswer”: {“@type”: “Answer”,”text”: “The best way to adjust the settings on a blue flame pitching machine is to refer to the manufacturer’s instructions. Generally, the settings can be adjusted to affect the speed and trajectory of the balls being pitched. Different settings should be tested to determine which is best for the user’s needs. Lastly, the machine should be set up on a level surface for optimal performance.”}},{“@type”: “Question”,”name”: “What Type Of Power Supply Is Needed To Operate A Blue Flame Pitching Machine?”,”acceptedAnswer”: {“@type”: “Answer”,”text”: “A blue flame pitching machine requires an AC power supply of 110 volts, 60 Hz, and a minimum of 15 amps. Most machines come with an appropriate power cord and plug. It is important to ensure that the machine is plugged into a dedicated circuit, meaning a circuit that is not shared with any other appliance. It is also important to make sure the circuit is not overloaded, by checking the circuit breaker.”}},{“@type”: “Question”,”name”: “How Often Should A Blue Flame Pitching Machine Be Calibrated?”,”acceptedAnswer”: {“@type”: “Answer”,”text”: “A blue flame pitching machine should be calibrated at least once a year, or more often if it is used frequently. The calibration should be done by a certified technician and should include checking the speed and accuracy of the machine. It is also important to check the safety features of the machine, such as the protection guards, to ensure they are in proper working condition. Regular maintenance and calibration of the machine is essential for optimal performance.”}}]}