Youth Catcher Gear Fitting: The Secret to Safety and Performance. Get it right the first time! Properly fitted catcher’s gear is crucial for young players’ safety and confidence behind the plate, preventing injuries and boosting their game. This guide makes finding the perfect fit easy.
Hey athletes and awesome baseball parents! John P. Miller here, from FriskMode. Ever watch a young catcher struggle to move, or worse, look a little unprotected? It’s a common sight, and it’s something we can fix. Getting the right fit for youth catcher’s gear isn’t just about looking the part; it’s about feeling comfortable, moving freely, and most importantly, staying safe.
When gear doesn’t fit right, it can be a distraction, hinder performance, and, in the worst cases, lead to injuries. We’ve all been there, trying to figure out what size goes where, and it can feel overwhelming. But don’t worry! I’m going to break it down for you, step-by-step, so you can confidently get your young catcher perfectly fitted. Let’s make sure their gear works for them, not against them, so they can focus on blocking pitches and throwing runners out. Ready to get your young star locked in and ready to play?
Why Proper Catcher Gear Fitting Matters for Young Players

Getting the right fit for catcher’s gear is non-negotiable for any young player stepping behind the plate. Think of it like building a house – you need a solid foundation. For a catcher, that foundation is their equipment. When this gear fits snugly and correctly, it acts as a second skin, offering maximum protection without getting in the way of movement. Loose gear can shift, leaving vulnerable areas exposed to impacts from foul balls or stray pitches. Conversely, gear that’s too tight can restrict motion, making it harder for a young player to block, frame pitches, or make quick throws. This can lead to frustration, decreased confidence, and even fatigue. Beyond comfort and performance, proper fit is a critical safety measure. Youth sports organizations and governing bodies, like Little League Baseball, emphasize the importance of protective equipment that meets safety standards and fits correctly to minimize the risk of serious injury.
A well-fitted set of catcher’s gear ensures that every piece – the mask, chest protector, and leg guards – stays in place during the most intense plays. This means better protection against direct impacts and also reduces the chance of equipment-related injuries, such as chafing or strain from ill-fitting straps. When a young catcher feels secure and comfortable in their gear, they can focus entirely on the game, developing their skills, and building their confidence. It allows them to move with agility, make quick decisions, and perform at their best. Let’s dive into how to make sure your young player’s gear is just right.
Understanding the Essential Pieces of Youth Catcher’s Gear

Before we get into fitting, let’s quickly rundown the key components of a catcher’s gear set. Each piece plays a vital role in protecting our young athletes behind home plate.
- Catcher’s Mask (or Hockey-Style Helmet): This is arguably the most important piece. It protects the face, head, and throat. Modern masks often feature a steel or titanium cage designed to withstand high-velocity impacts.
- Chest Protector: This covers the torso, protecting the chest, stomach, and collarbone area. It’s designed with multiple pads to absorb shock from pitches and foul balls.
- Leg Guards: These protect the shins, knees, and feet. Good leg guards offer both padding for impact absorption and sturdy coverage to prevent direct hits from catching the skin.
- Catcher’s Mitt: While not strictly “gear” in the protective sense, it’s essential equipment. A catcher’s mitt is larger and more padded than a fielder’s glove, designed for quick transfers and securing fast pitches.
- Throat Protector (often integrated or attachable): An additional piece of protection that attaches to the mask to cover the throat, a very vulnerable area.
- Cup (optional but recommended): For boys, a protective athletic cup is highly recommended for groin protection.
Each of these items needs to fit securely and comfortably to provide optimal protection and allow for freedom of movement. We’ll cover how to ensure each one is just right.
The Golden Rules of Catcher Gear Fitting

When it comes to fitting youth catcher’s gear, a few core principles will guide you. These simple rules apply across the board, ensuring you’re on the right track for every piece of equipment.
- Prioritize Protection Over “Grow Room”: It’s tempting to buy gear a size up for them to grow into, but this is a safety hazard. Gear that is too big won’t protect effectively and can actually hinder movement. Fit it for them now.
- Mobility is Key: The player should be able to crouch comfortably, get up quickly, and move their arms freely. If the gear restricts their natural movements, it’s not the right fit.
- No Irritating Pinch Points: Ensure there are no straps digging into the skin or pads that press uncomfortably on bones. The gear should feel supportive, not painful.
- Secure Straps are Crucial: All straps should be adjustable and able to be tightened securely without being so tight they cut off circulation. The gear should stay put.
- Check for Overlap: Make sure there are no significant gaps between pieces of gear. For example, the bottom of the chest protector should align reasonably well with the top of the leg guards to avoid exposed areas.
Following these rules will make the fitting process much smoother and more effective, ensuring your young catcher is both safe and ready to compete.
Step-by-Step Guide to Fitting Youth Catcher’s Gear

Let’s get hands-on! This section will walk you through fitting each crucial piece of catcher’s gear. Remember to have your young player wear the type of athletic clothing they’d typically wear to a game or practice when trying on gear.
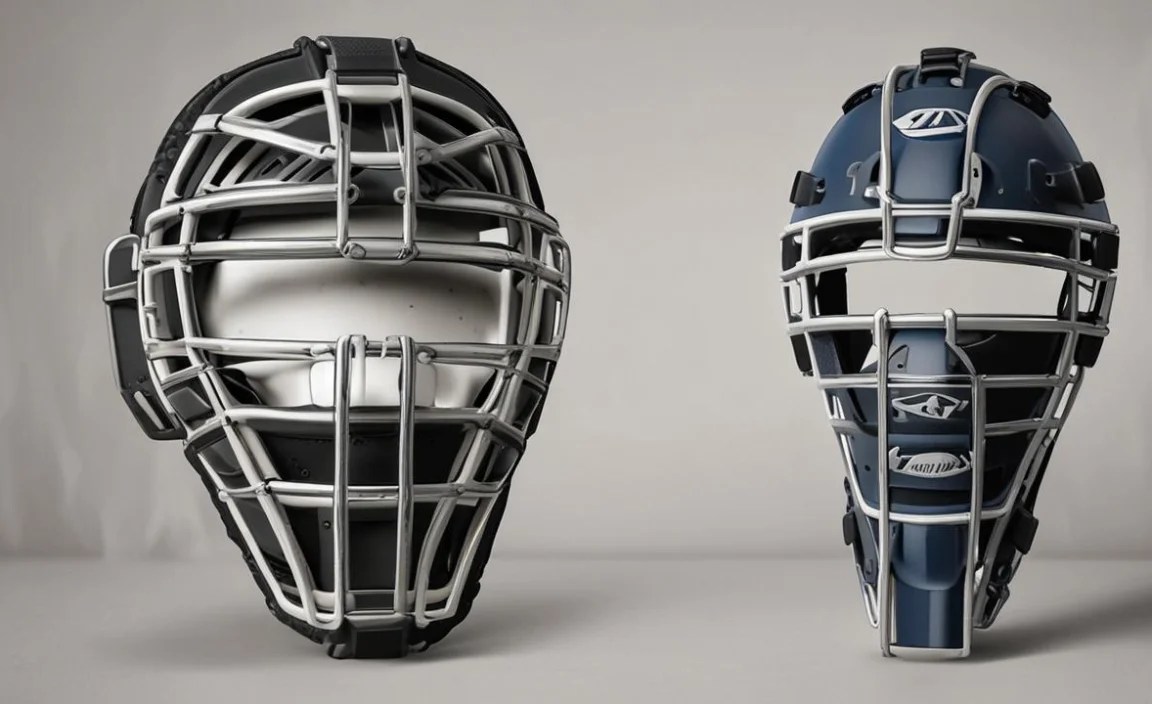
1. Fitting the Catcher’s Mask or Helmet
The mask is the first line of defense. A proper fit ensures it stays on and protects effectively.
For Traditional Catcher’s Masks:
- Jaw/Chin Fit: Have the player put on the mask. The chin should rest comfortably within the mask’s chin guard, without being crammed or having too much space. When they smile or speak, the mask should move with their face slightly, but not slide down.
- Cheek Fit: The mask’s sidebars should bracket the cheeks. There shouldn’t be significant pressure on the cheekbones, nor should there be large gaps on the sides.
- Forehead/Crown Fit: The mask should sit comfortably on the forehead. The crown of the head should be well-covered by the top of the mask.
- Strap Adjustment: Adjust the back straps so the mask is snug but not constricting. It shouldn’t wobble when they shake their head. The straps should lie flat against the back of their head.
- Throat Protector (if separate): Ensure the throat protector, if it’s a separate piece, extends far enough down to cover the neck and throat area without pressing uncomfortably against the chin.
For Hockey-Style Catcher’s Helmets:
- Head Circumference: Measure the player’s head circumference if unsure of sizing. Helmets often use this measurement.
- Nose/Bridge Fit: The cage should be positioned so the player has good visibility and the cage doesn’t obstruct their view of the ball. The nose guard should align properly.
- Chin Fit: Similar to the traditional mask, the chin should fit snugly in the chin cup.
- Ear Protection: Modern hockey-style helmets often have built-in ear protection. Ensure these pads are comfortable and provide good coverage.
- Strap and Fit System: Many hockey-style helmets have internal adjustment systems (dials, straps) for a custom fit. Adjust these until the helmet is secure and doesn’t move easily when the player shakes their head.
A good resource for understanding head sizes is often provided by the manufacturer, or you can consult organizations like the Wikipedia page on baseball equipment which touches upon protective gear standards.
2. Fitting the Chest Protector
The chest protector guards the heart, lungs, and abdomen. Fit is critical for both protection and allowing pitchers to throw comfortably.
- Length: The protector should cover from the collarbone down to the stomach/waist area. A common guideline is roughly 2-4 inches below the sternum. It should not extend too far down the player’s midsection, which can interfere with the catcher’s stance and receiving.
- Width: It should provide ample coverage across the chest and shoulders. It shouldn’t be so wide that it restricts arm movement or so narrow that it leaves side areas exposed.
- Shoulder Straps: Adjust the shoulder straps so the protector sits comfortably on the shoulders. They should be snug enough to keep the protector in place but not so tight as to pinch.
- Side/Back Straps: These straps secure the protector to the torso. Tighten them so the protector is firm against the body but allows the player to breathe and crouch easily. There should be no excessive movement when the player moves.
- Flexibility: While protective, the chest protector should still allow for flexibility. Have the player go through a catching stance – can they bend their knees and torso naturally?
Pro Tip: Ensure the chest protector doesn’t extend so low that it interferes with the waistband of the player’s pants or the top of their leg guards. There should be a smooth transition.
3. Fitting the Leg Guards
Leg guards are vital for protecting the knees, shins, and feet. They need to be secure and provide full coverage.
- Knee Cap Fit: The knee cap of the guard should align directly with the player’s kneecap. It should be centered and offer full coverage when the player is in a crouch.
- Shin Coverage: The shin portion of the guard should extend from just below the knee down to the top of the player’s cleats/shoes. It should cover the entire shin bone.
- Ankle/Foot Protection: Most youth leg guards have a toe flap or extension that covers the top of the foot. This should align with the shoe and not impede the player’s ability to pivot or move their feet.
- Strap Security: Leg guards typically have multiple adjustable straps. Fasten them snugly around the calf and thigh. The guards should not slide down the legs when the player is moving or crouching.
- Overall Coverage: When worn, the leg guards should overlap slightly with the bottom of the chest protector and extend down to the feet, leaving no significant gaps on the front or sides of the legs.
- Comfort and Mobility: Have the player squat, stand, and take a few steps. The leg guards should feel secure and allow for natural movement without digging into the legs or restricting their stance.
Chart: Catcher’s Gear Sizing Guidelines (Approximate)
| Age (Years) | Height (in.) | Chest Protector (in.) | Leg Guards (in.) | Hat Size / Head Circumference (in.) |
|---|---|---|---|---|
| 5-7 | 40-48 | 12-14 | 16-18 | XS / up to 21″ |
| 7-9 | 48-54 | 14-16 | 18-20 | S / 21″ – 21.75″ |
| 9-12 | 54-60 | 16-18 | 20-22 | M / 21.75″ – 22.5″ |
| 12-14 | 60-66 | 18-20 | 22-24 | L / 22.5″ – 23.5″ |
| 14+ (Youth Sizing) | 66+ | 20-22 | 24-26 | XL / 23.5″+ |
Note: These are general guidelines. Always refer to specific manufacturer sizing charts as measurements can vary.
4. Fitting the Catcher’s Mitt
A catcher’s mitt is specialized. While not about protective fit, its fit and feel are critical for performance.
- Glove Size: Youth catcher’s mitts are typically smaller than adult ones, ranging from 28 to 32 inches in circumference. The size should feel proportionate to the player’s hand and arm length.
- Finger Stall Fit: All fingers should fit comfortably into their respective stalls. There shouldn’t be excessive room, which makes it hard to control the glove, nor should they be so tight they are painful.
- Thumb & Pinky Placement: The mitt is designed with a deep pocket and a thumb and pinky stall. The player’s thumb should go into the thumb stall, and their index finger can either go into its own stall or rest along the side of the mitt, depending on player preference and mitt design.
- Pocket Depth: The pocket should be deep enough to securely catch the ball. A deep pocket helps cradle the ball, preventing pop-outs and making transfers easier.
- Wrist Strap Adjustment: Mitts have adjustable wrist straps. Tighten these to secure the mitt to the hand, ensuring it doesn’t feel loose or shift during play. It should feel like an extension of the hand.
- Break-in: All catcher’s mitts require a break-in period. A properly fitted mitt will be easier to break in and will mold better to the player’s hand.
For more on glove technology and care, manufacturers like Rawlings or Wilson often provide detailed guides. You can also find helpful resources on baseball training sites discussing glove ergonomics.
Common Pitfalls to Avoid During Fitting
Even with the best intentions, fitting youth catcher’s gear can sometimes lead to minor hiccups. Being aware of these common mistakes can save you time and ensure your player is properly equipped from the start.
- Buying Gear Too Big: As mentioned, the urge to buy gear that’s too large so the player can “grow into it” is a significant safety concern. Ill-fitting gear is less protective and compromises mobility. It’s better to buy the correct size now and upgrade later if needed.
- Ignoring the Player’s Feedback: While you’re the expert on fit, the player is the one who has to wear it. Pay attention to their comments about comfort, pinching, or restricted movement. If they say it hurts or feels weird, investigate why.
- Not Testing Full Range of Motion: Simply putting on the gear isn’t enough. Have the player move! Ask them to squat, stand up quickly, pivot their feet, rotate their torso, and swing their arms. This simulates game action and reveals fit issues.
- Forgetting About Under-Gear: Players will wear undershirts or compression gear. Ensure the fitting process accounts for this, as it can slightly alter how the gear sits on the body.
- Over-Tightening Straps: While straps need to be secure, overtightening can cause discomfort, restrict breathing, and impede circulation. The goal is snug but comfortable.
- Disregarding Manufacturer Sizing Charts: Every brand has slightly different sizing. Always consult the specific brand’s sizing chart for the best approximation of what size is needed, and then use that only as a starting point for trying it on.
Avoiding these common issues will lead to a much better experience for both you and the young catcher.
The Role of Catcher’s Gear in Injury Prevention
Beyond providing a good fit, understanding how catcher’s gear contributes to injury prevention adds another layer of importance to this topic. Proper gear, when fitted correctly, acts as a crucial barrier against common baseball injuries.
- Impact Absorption: The primary function of the mask, chest protector, and leg guards is to absorb and distribute the force of impact from pitches, foul tips, and collisions. This significantly reduces the risk of bruises, fractures, and internal injuries. For instance, a well-padded chest protector can turn a painful blow from a foul ball into a manageable impact.
- Protection from Direct Hits: Without proper leg guards, a fast-moving ball or a player’s own bat could easily strike a shin or knee, leading to nasty cuts, contusions, or even broken bones.
